A couple of days ago, Gala Darling posted her weekly column, “Things I Love Thursday,” and I was immediately inspired by her awesome bracelet and necklace holders? racks? I feel so challenged sometimes with the names of things, but you see what I’m sayin’.

Photo Credit: Gala Darling
They are so simple, yet can hold quite a bit of your best sparklies & spikes. A total space-saver! As you can see, I was in dire need of a jewelry showcase makeover. See that jewelry box?! I’ve had that since I was a little girl. Definitely not fitting the vibe of a 35 year old rocker! I need some STEEL!

Lately I have become a huge fan of steel piping. It IS a little pricey, but the results are BADASS, and working with it is relatively simple. The hardest part is waiting for the paint to dry before you screw everything together!
Here are some examples that my husband and I have used in our home.

Shelf / Coat / Purse Rack

Growler Shelf
Rest assured, the jewelry stands are MUCH easier than the shelving, but you can see that the results are pretty bitchin’.
Here’s what you’ll need to make the stands:
- 3/4″ Floor Flange
- 3/4″ x 10″ nipple
- 1/2″ tee
- 1/2″ close nipple
- 3/4″ x 1/2″ coupling – reducing
- two 1/2″ x 6″ nipples
- Two 1/2″ caps
- One can of Rust-oleum Metallic in Oil Rubbed Bronze (optional)

Equipment List (toes optional)

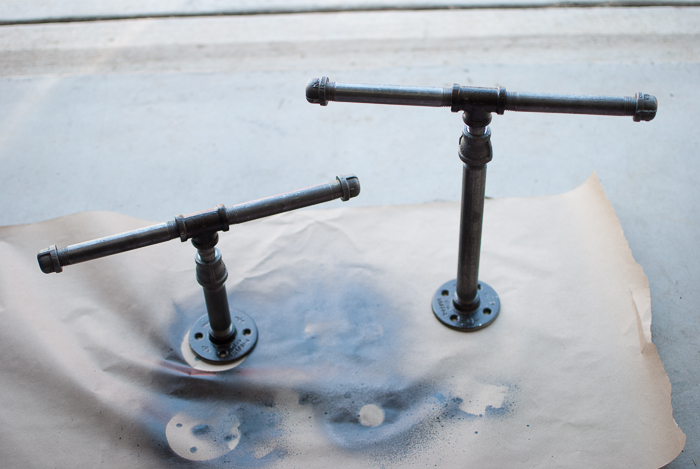
You can find everything you need at your local hardware store, but generally not all of it comes in the same color. It also comes a little oily, so I gave everything a good washing and drying before continuing. The tee and floor flange I found were more of a silver-y color, so I used some spray paint to make them look similar to the other hardware.

Next, screw all of the pieces together! I started with 3/4″ circumference for the piping base (flange and 10″ nipple), and used a coupling reducer to move to a smaller 1/2″ for the stand arms.

The 10″ nipple screws into the coupler, then the 1/2″ close nipple into the coupler.

Now we’re ready for the 1/2″ tee, and the arms!


Ta-Da!! One finished, rugged, steam-punky necklace stand!

…and a bracelet stand to match!

How refreshing!! This freed up so much space for me, and it’s just my style too. Hard, cold, steel. I also love it because you can SEE all your stuff right out of the gates. When I was populating these beauties, there were things that ran across that I hadn’t seen in AGES! It was like going shopping in a store that is designed just for you!


Heavy Metal Love,

More space = More Jewelery :-//
LOL cool write up Natalie!!
Bad ass, babe!!! That is a hell of a lot of nipples…
I am in LOVE with this post! And your entire blog, really. Say hello to your newest reader. 🙂
-Miranda
Love your blog and your creative ideas! Can you share the specifics on making the growler shelf or direct me to a previous entry about it? Thanks.